Cách ẩn để giới hạn RAM trên Windows 11 có kết quả bất ngờ
Windows 11 cho phép người dùng giới hạn lượng RAM mà hệ điều hành sử dụng, mặc dù nó được thiết kế để sử dụng toàn bộ bộ nhớ có sẵn. Tính năng này hữu ích cho việc kiểm tra phần mềm, khắc phục sự cố hoặc mô phỏng hệ thống với bộ nhớ thấp hơn. Để thực hiện điều này, người dùng cần sử dụng công cụ System Configuration (msconfig) cũ, được thiết kế chủ yếu cho mục đích kiểm tra và gỡ lỗi.
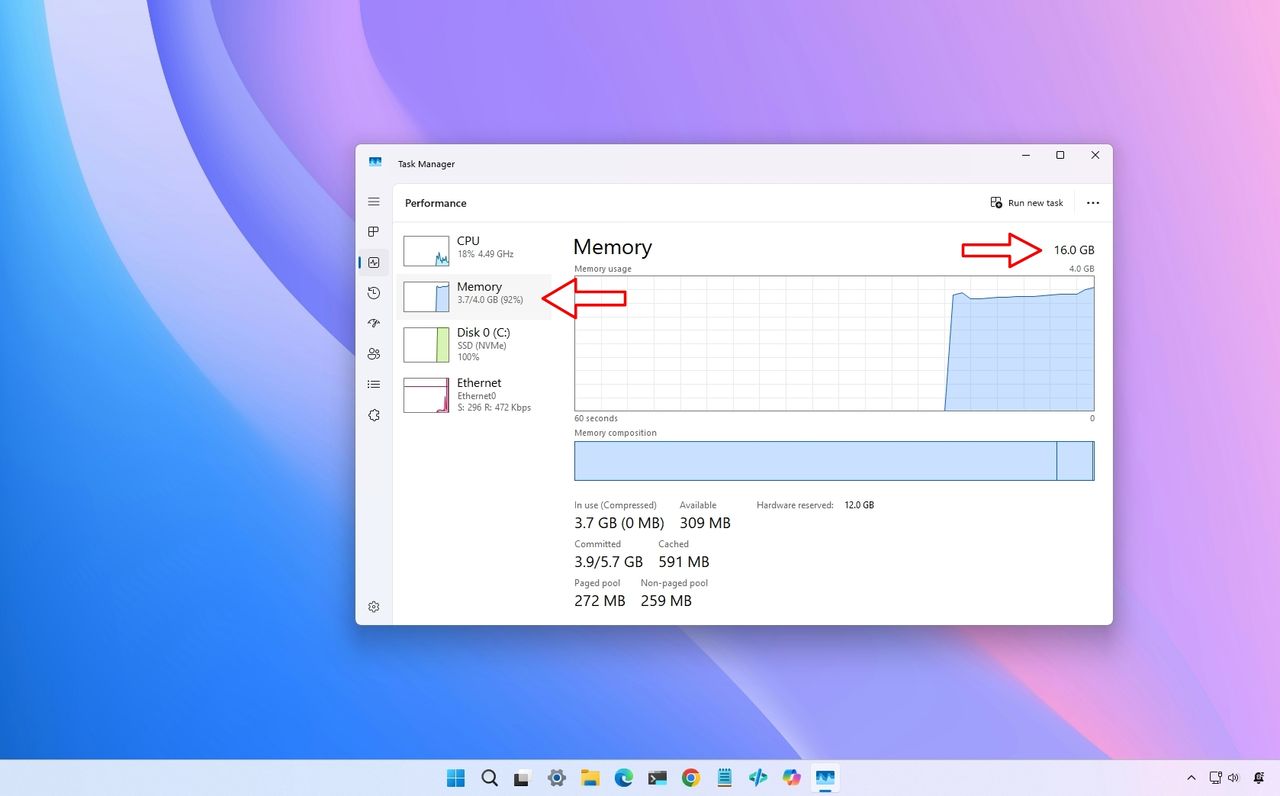
On Windows 11 , even though the operating system is designed to use all the memory installed on your computer , you can limit how much RAM the operating system uses if you need to test software, troubleshoot issues, or simulate a lower-memory system. However, the system doesn't include a simple setting to tell it to "only use 4GB of RAM." Instead, you have to use the legacy System Configuration tool (msconfig) , which is intended primarily for testing and debugging. In this how-to guide , I'll outline the steps to restrict the amount of memory that Windows 11 can use. ⚠️Important: This setting limits the amount of memory available to the entire operating system. It's not meant for everyday use because it can significantly reduce performance and cause some apps to run slowly or stop responding. You have been warned. How to limit the system RAM on Windows 11 To restrict the amount of memory available to Windows 11, use these steps: Open Start . Search for System Configuration (or msconfig ) and click the top result to open the app. Click the Boot tab. Select the current Windows installation (if applicable). Click the Advanced options button. (Image credit: Mauro Huculak) Check the Maximum memory option. Confirm the amount of memory you want Windows 11 to use (in megabytes). (Image credit: Future) Quick tip: Since you have to enter a value in megabytes, use 4096 (4GB), 8192 (8GB), 16384 (16GB), or 32768 (32GB). Click the OK button. Click the Apply button. Click the OK button. Restart the computer. After you complete the steps, Windows 11 will only use the amount of memory you specified. Any remaining installed RAM will be ignored until you remove the restriction. While I was testing this configuration, I noticed that Task Manager reported 3GB when I set the memory to 4GB, because the operating system doesn't get the full 4GB, as part of the physical address space is reserved for other components. If your goal is to test the operating system with exactly 4 GB available, you may want to reserve an extra 1GB. For example, 5120 (5GB) to see 4GB in Task Manager. However, depending on how much memory you want to allocate, you may want to try different sizes. How to restore full RAM access on Windows 11 To restore the amount of memory available to Windows 11, use these steps: Open Start . Search for System Configuration (or msconfig ) and click the top result to open the app. Click the Boot tab. Select the current Windows installation (if applicable). Click the Advanced options button. (Image credit: Mauro Huculak) Clear the Maximum memory option. (Image credit: Mauro Huculak) Click the OK button. Click the Apply button. Click the OK button. Restart the computer. Once you complete the steps, the operating system will once again detect and use all available RAM. Why would you limit RAM? This feature is primarily intended for testing rather than everyday use. Some common scenarios include testing how an app performs with limited memory, troubleshooting memory-related software issues, simulating older or lower-end hardware, and software development. For instance, we recently tested out how using 8GB of RAM on Windows 11 in 2026 works for performance . If your goal is to reduce overall memory usage or free up RAM , it's better to turn off unnecessary startup apps, close background applications, or upgrade your system instead of limiting the operating system's available memory. Why can't you set the maximum memory? On some modern computers, particularly those using UEFI firmware with Secure Boot enabled, the "Maximum memory" setting may be unavailable or ignored. If this happens, you may need to temporarily disable Secure Boot before applying the memory limit. ⚠️Warning: Disabling Secure Boot lowers your computer's protection against boot-level malware and may prevent some security features from working as expected. Only disable Secure Boot temporarily if you're testing, and re-enable it afterward. Disable Secure Boot To disable Secure…